Showing posts with label tutorials. Show all posts

Friday, 1 May 2009

tutorial | tissue case

You will need:
two paper templates; 7 inches x 6 inches (outer) and 8 inches by 6 inches (inner)
fabric for both the outer and inner of your tissue case
a packet (or two) of tissues


1. Choose your fabric, these don't use a lot so you can cut into that favourite print for this one!


Pin, and cut out the fabric using the paper templates you made with the measurements given.


2. Place and pin right sides together on one of the shorter sides (6 inches).


Sew together using both a straight stitch and either overlock or zig-zag stitch.

Do the same to the other end.


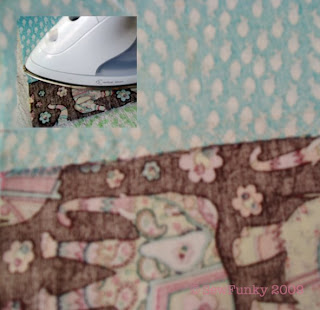
3. Iron the seams towards the outer fabric.


4. Turn the fabric right-side out and iron. There will be a small overlap of lining on each 6 inch side. :)


5. Fold in half and iron so that you know where you are going to sew the side seams. Fold one side to the halfway mark and pin.


Do the same to the other side, overlapping slightly at the middle.


Now sew each end, by using both the straight stitch and zig-zag stitch.


6. Turn right-side out and use a knitting needle to push out the corners.

TAH DAH!!!


Kudos to Lianne who chose the fabric combination!

I've now made three for each of my wonderful daughters to take to school with them! The elephant one goes to Briahna, the circus one to Aimee and the cute retro one will be Hope's. Woo hoo! :D

Monday, 12 January 2009

It's a wrap...

Hehehe!, well actually it's a crayon wrap! :)

Avert your eyes, Rebekah and Jodz, or you'll ruin the surprise!

Today is the first day that we are kidless! Well, they left yesterday, and today's the first full day away from them. Can you tell I'm missing them already? Well, kinda, at least it's given me some wonderful time to get creative!

I wrote my first review on Filmguide late last night after watching Australia - go check it out and tell me what you all think! The first part of the review was written by Mr Sew-Funky and the second part, by me! A kind of "he say's, she say's" review!

Back to the original reason for this post - the crayon wrap!

I don't know if you've ever been stuck with lot's of broken crayons before, but with three budding artists in the family, I am. So what to do with the useless little bits... Well, you can make new ones, rainbow ones if you like... And so before I even made the crayon wrap prototype I wanted to make some wee crayons by recycling the old. :)

Here's how;

You need something to melt them in, I chose an old gem iron, but you can make them in muffin pans too!

You need some old worn out crayons, my girls have plenty! :) Don't worry if they look awful, they won't look bad for long!

Put baking paper in the gem iron (so they won't stay in there after melting!). Break up the crayons and put them in. I chose similar colours, but you can mix the crayons up for a rainbow effect!

Put them in the oven at 180 degrees Celcius for about 15 minutes. Look at them melt, this is after around 5 minutes.

They're ready to take out when they look like this! Leave them to set in the gem iron. :)

This is what they looked like when I took them out of the iron, all ready to put into the new crayon wrap!

Tah Dah! All ready to use by little hands!

And here are the gorgeous little wraps that I made for Miss Jodz Stuff and for my cute little nephew Mo!

This is what they look like when they're open. They have a little flap that covers the crayons. :)


Seriously cute, don't you think?

Friday, 5 December 2008

tutorial | Dodecahedron Christmas Ornament

A couple of weeks ago I wrote a post about some really neat ornaments I had been making, see below pic...Well, I've finally gotten around to taking some photo's so that you too can make one (or two...) for your tree! Excuse the quality of some of the photographs, I think I need to get some lessons from Mr. Sew-Funky over the Christmas break!

I discovered that this particular shape is actually called a dodecahedron (a bit of a mouthful to say - but good all the same!).

What you need...
Scraps of fabric
12 pentagon templates (you can get some here, just cut them out of plain paper)
thread (2 different colours - one to match the fabric, one obviously different to the fabric)
soft toy stuffing
ribbon

1. Cut out 12 templates.

2. Pin the templates to the wrong side of your chosen fabric.

3. Cut around the template leaving a 1cm seam allowance all the way around.

4. Begin tacking the fabric to the template using the different coloured thread, folding the seam allowance over the template. Do this to all 12 pentagon shapes.

5. Sew the pentagon shapes together, around two of the pentagons making two flowers.
Use the matching thread.

6. Sew the two flowers together.


7. Sew up all the seams, except one.

8. Remove the templates, by undoing the tacking.
9. Turn the fabric the right way around.

10. Fill with stuffing.

11. Cut some ribbon (I think I used around 5cm). Sew up the last remaining seam, sewing in the ribbon inside the seam at the end.
12. Tah Dah!!!
Let me know if you make one... :D

Wednesday, 5 November 2008

new peg bag | refashioned


So, I've been needing something to hold my pegs for a while. Having a family of 5, means that there is LOTS of washing and therefore lots of pegs! So what to do...

As soon as I spyed this jersey at Mr Bo. Jumbles I knew it was perfect. It was already a little felted, and I just threw it into a hot wash and dried it in the drier once to make just that little bit more felted!

All I needed to do was;

1. Cut off the arms. You don't need them for this project, but you could use them for something else (a softie, perhaps?)


2. Sew up arm holes.


3. Sew up the bottom.


4. Insert a coathanger, and TAH DAH!

Monday, 11 August 2008

bags from rags...

well, not really rags, but from old singlet t-shirts. I had an epiphany this afternoon whilst looking at some old tops that Jodz gave to me a month or more ago. Yes, I finally got round to looking in that bag you dropped off Jodz! I didn't really need any more tops, plus it's too cold around here to think about summer yet...

I think the only downside to these bags is that you wouldn't want to overfill them. I don't think your family's weeks worth of canned food is gonna do any good, because the straps are just too skinny.

Anyway, they are so super easy and I took a few photos to do a tute. Here goes...

the singlet bag

1. Choose a singlet, I liked this one with beading on the front.

2. Turn inside out, and then sew up the bottom seam. I used zigzag because the material is knit.


3. Fold up the bottom seam to meet the side seam in a triangle. Then sew across the triangle about 2 inches in. This gives your bag a boxed bottom. On my singlet it was easy to figure out where to sew, because the bottom had a cuff - you can see it in the above picture.


4. I then sewed the "triangle" down to the bottom of the bag. You could just skip this step, especially if you wanted a smaller bottom to your bag.

the inside

what it looks like on the outside...

5. Snip the threads and you're done... A very quick project that's quite satisfying!

I've made 2 already!!!

great for storing all that cupcake material you bought at Spotlight - hehehe!
LinkWithin Related Stories Widget for Blogs

My Etsy Store

Check out my sister's creativity

Come join in the giveaways... Jan 25th

Photo

Followers

Film Guide

Calendar

I am Loving...

Sew Translatable

I'm a faraway brown owl!

Brown Owls

taking a little stand...

Visitors